 DriftEngine
Rendering
Colour and motion
The tone curve, exposure and an eye that adapts, colour grading with a lookup table, vignette, grain and fades, depth of field and motion blur.
npm install @driftengine/core @driftengine/script
The last things done to a frame decide how it looks more than most of what came before: how light values become screen values, how the eye adapts, what colour the whole picture leans, and what a camera does to it, focus and blur. The example puts all of them on one colonnade at dusk, with its lens written in DriftScript; every switch under it changes the running frame.
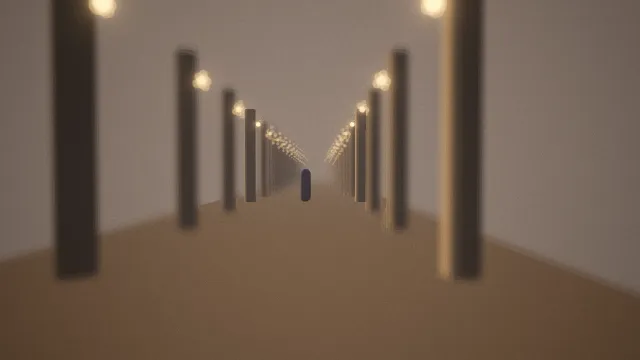
Starts examples/look in this page, on WebGPU where your browser has it.
Ceilings and dials
/** The ceilings: what each effect may cost. The per-frame dials below say how much of it to use. */
const stage = await openStage({
  outputTransform: 'aces',
  hdrScene: true,
  bloom: 0.35,
  bloomThreshold: 1.1,
  depthOfField: 0.02,
  cameraMotionBlur: 1,
  sceneSamples: 4,
});Most of these effects come in two halves. A quality option, fixed when the renderer is built, says
whether the effect exists and how much it may cost: depthOfField is how far a defocused point may
spread, cameraMotionBlur how much blur is possible. A setter, called per frame, says how much of
that the frame wants. A device that cannot afford an effect caps it in one place, and a game turns
it up and down without rebuilding anything.
/** Each switch changes the running frame: a dial the lens reads, or a grade set once. */
controls([
  {
    key: 'grade',
    label: 'grade',
    value: flag('grade', 'warm'),
    options: ['none', 'warm', 'cool'].map((g) => ({ text: g, value: g })),
    change: (value) => applyGrade(value),
  },
  {
    key: 'focus',
    label: 'focus',
    value: flag('focus', 'on'),
    options: onOff,
    change: (value) => {
      lensState.focusing = value === 'on' ? 1 : 0;
    },
  },
  {
    key: 'blur',
    label: 'motion blur',
    value: flag('blur', 'on'),
    options: onOff,
    change: (value) => {
      lensState.blurring = value === 'on' ? 1 : 0;
    },
  },
]);
lensState.focusing = flag('focus', 'on') === 'on' ? 1 : 0;
lensState.blurring = flag('blur', 'on') === 'on' ? 1 : 0;That is why the example's switches need no new renderer: the ceilings are set once, and a switch writes the share of them the lens takes.
The lens, in DriftScript
fn present(lens: mut Lens, renderer: Renderer, turnRate: f32, dt: f32) {
    render.exposure(renderer, 1.2)
    // Focused on the figure 21 metres down the floor, with three metres sharp.
    render.focus(renderer, 21, 3, lens.focusing)
    // Blur only while the camera turns fast, in full at three radians a second: always on, it is a
    // filter nobody reads as speed.
    render.motionBlur(renderer, math.clamp(turnRate / 3, 0, 1) * lens.blurring)
    if lens.fade > 0 {
        lens.fade = math.max(lens.fade - dt, 0)
        render.veil(renderer, 0, 0, 0, lens.fade / 2)
    }
}The lens is a DriftScript module. drift/render gives a script the per-frame dials, exposure,
focus, motionBlur, speedBlur, bloom, bloomAbove, medium and veil, and none of the
quality ceilings, so a script decides how the frame looks within what the device was allowed. It
takes the renderer as an argument; the page calls present once a frame.
/**
 * Load a compiled `.drs` module and bind it. Most of the modules the examples import need no host;
 * `drift/navigation` needs the graph it routes over, which is what `services` is for.
 */
export function hostScript(compiled: unknown, services: HostServices = {}): DriftModule {
  const module = loadModule(compiled as Record<string, unknown>);
  const bound = bindModule(module, services);
  if (!bound.bound) throw new Error(bound.reason);
  return module;
}

/** One of the module's exports, by name: a function, or the factory a `data` declaration makes. */
export function exported<T>(module: DriftModule, name: string): T {
  const value = module.exports[name];
  if (value === undefined) throw new Error(`the script exports no ${name}`);
  return value as T;
}/** The lens, hosted: its record lives here, so a patched module carries on from it. */
const lens = hostScript(lensScript);
interface Lens {
focusing: number;
blurring: number;
}
const lensState = exported<() => Lens>(lens, 'createLens')();
type Present = (lens: Lens, renderer: RendererApi, turnRate: number, dt: number) => void;
if (import.meta.hot) {
import.meta.hot.accept('./lens.drs', (next) => {
if (next !== undefined)
patchModule(lens, next as Record<string, unknown>, { Lens: [lensState] });
});
}The page loads the compiled module, binds the engine capabilities it imports, and holds the Lens
record itself. When the dev server delivers an edited lens.drs, patchModule swaps the functions
and keeps the record, so the focus and the fade carry on from where they were with the new code
running. Open the example under npm run examples, change the focus distance in present, and
save. The grade, the eye's adaptation, the vignette and the grain are not bound for scripts, so the
example sets them in TypeScript.
The tone curve
outputTransform turns scene light into screen colour.
'none', the default, writes values as they are, and anything above 1 clips flat. A scene with bright lamps against dark surroundings then reads as crushed and muddy, which looks like a lighting problem and is not.'srgb'applies the display's transfer curve without a tone curve.'aces'rolls highlights off smoothly before that, so bright light keeps its colour. It is the usual choice, and it is what exposure, grading and the eye below need.'shoulder'keeps sRGB's midtones exactly and eases only the highlights. Past 0.8, the brightest channel rolls toward 1 and the other two are scaled with it, so an overbright red spark stays red where'srgb'would clip each channel and turn its core pink. It has none of ACES's toe or desaturation. Use it to match a renderer that grades this way, or when the midtones must stay as authored.'filmic'is a film curve shaped by five numbers, and it holds mid grey where it is: 0.18 of scene light comes out at 0.18, where'aces'gives about 0.11. A straight segment through mid grey meets a soft toe below and a shoulder above, in the ACEScg working space, with the ACES reference's glow and red modifier around it. Its numbers are held until changed, byrenderer.setFilmicCurve({ slope, toe, shoulder, blackClip, whiteClip }); a renderer starts withDEFAULT_FILMIC_CURVE, which is slope 0.88, toe 0.55, shoulder 0.26 and the clips 0 and 0.04. A longertoelifts the shadows, a largershoulderrolls the highlights off sooner, and the two clips let black crush and white clip. A grading tool's look is matched by passing its numbers rather than by baking the difference into a colour grade, whose lattice has the fewest steps exactly where two curves differ most, in the shadows. It is applied by the composite alone, so it needsscreenEffectsandhdrScene; without them every pass grades with'aces', and the renderer says so once.
If a scene looks dark and flat, try 'aces' with an outputExposure before touching a light.
The default stays 'none' only so no existing game changes. With screenEffects on, the curve is
applied once at the end of the frame; without it, each pass applies it itself.
High dynamic range displays
highDynamicRange: true asks for a canvas whose highlights run past paper white, as far as the
display can show. It is had only where three things hold: the renderer is on WebGPU, the frame keeps
its light past white (screenEffects and hdrScene), and the display reports a high dynamic range.
renderer.displayRange says which range the frame goes out in, 'high' or 'standard', and
renderer.displayRangeReason says why, so a game can choose a look graded for the output it got.
WebGL2 always answers 'standard': it draws into an eight-bit canvas. On a high range, tell it the
display's paper white and peak, as renderer.setDisplayLuminance(203, 1000) does for a display
whose white is 203 nits and whose peak is a thousand.
setDisplayLuminance(paperWhite, peak) takes the two in any one unit; their ratio is how far above
white the highlights may reach. Paper white stays where it was, and so does everything below it:
under 'filmic' the shoulder rolls off toward the display's peak instead of toward white, with the
toe and mid grey unchanged, and a colour grade colours a highlight without clipping it back to white.
On a standard display it changes nothing. A host without a browser display query answers it with
createRenderer's highDynamicRangeDisplay option.
Exposure and the eye
/* The lens: exposure, focus on the figure, blur while turning, and the fade in. */
exported<Present>(lens, 'present')(lensState, renderer, turnRate, dt);
/* What a script does not reach: the eye's adaptation, the vignette and the grain. */
renderer.setAutoExposure(0.6, dt);
renderer.setVignette(0.35);
renderer.setFilmGrain(0.025, Math.floor(time * 60));setOutputExposure(exposure) scales scene light before the tone curve, per frame; a script sets the
same dial with render.exposure, as the lens does. The engine does not decide when it should
change: a game knows it walked into a cave, and the renderer could only
find out a frame late. Easing toward a target with easeExposure is two lines; see
Sky and atmosphere.
setAutoExposure(strength, dt) is the eye adapting to what the frame actually shows. The finished
scene is metered on the GPU each frame, a held brightness moves toward it, about 78% of the way in a
second, and the frame is scaled toward middle grey by strength of the stops between, at most six
either way. setOutputExposure becomes a bias on top, so night can stay darker than day. The time
is yours, so a held capture passes 0 and holds. Every pixel counts the same; there is no spot
metering.
setLocalExposure(strength) brings each region of the frame toward the frame's own brightness, at
most three stops. A sunlit courtyard holds fifty times the light on its paving that it holds under
its arcades, and one exposure leaves one of the two black or white; this lifts the shade as shade.
About 0.5 is a photograph's latitude.
Both need screenEffects and hdrScene, and say so once on the console when they lack them.
Colour grading
/**
 * A grade is a lookup table over display colours. Start from the identity and bend it: here every
 * colour leans warmer or cooler, the highlights more than the shadows.
 */
function gradeLut(look: 'warm' | 'cool'): ColourGradeLut {
  const lut = identityGradeLut(17);
  const warm = look === 'warm' ? 1 : -1;
  for (let i = 0; i < lut.data.length; i += 4) {
    const r = lut.data[i] / 255;
    const g = lut.data[i + 1] / 255;
    const b = lut.data[i + 2] / 255;
    const light = (r + g + b) / 3;
    const tilt = (0.3 + light) * 0.07 * warm;
    lut.data[i] = Math.round(Math.min(1, Math.max(0, r + tilt)) * 255);
    lut.data[i + 1] = Math.round(Math.min(1, Math.max(0, g + tilt * 0.3)) * 255);
    lut.data[i + 2] = Math.round(Math.min(1, Math.max(0, b - tilt)) * 255);
  }
  return lut;
}
const grades = { warm: gradeLut('warm'), cool: gradeLut('cool') };
function applyGrade(name: string): void {
  renderer.setColourGrade(name === 'warm' ? grades.warm : name === 'cool' ? grades.cool : null);
}
applyGrade(flag('grade', 'warm'));setColourGrade(lut, strength) applies a lookup table over display colours after the tone curve:
the look of the whole picture, a warm evening or a cold morning. A ColourGradeLut is a cube of
size points per axis, as eight-bit RGBA, red fastest and blue slowest; 32 and 33 are what grading
tools export, and 64 is the most. identityGradeLut(size) is a table that changes nothing, which is
where a grade built in code starts. The grade is held until set again, and uploaded only when the
table changes, so calling it every frame is free. null removes it. It needs screenEffects.
Vignette, grain and fades
setVignette(strength)darkens the corners as a lens does, before the tone curve: 0.5 is about 1.2 stops at the corner.setChromaticAberration(intensity, start)parts the colours toward the frame's edges as a simple lens does: red and green land nearer the centre than blue, by their wavelengths' distance from it.intensityis a percentage, from 0 for none;startis how far out the fringe begins, as a share of the half-frame, 0 at the centre. Under heavy motion blur or depth of field the fringe softens with the blur.setFilmGrain(strength, seed)adds grain in display values, after the grade; 0.03 is fine grain. The seed is yours: a new one each frame for grain that moves, the same one for a still that is identical run to run.setFrameVeil(r, g, b, alpha)lays a colour over the finished frame for fades and dips:(0, 0, 0, 1)is exact black and(1, 1, 1, 1)exact white. It sits after the tone curve and before grain and vignette, so a dip takes the whole image down together, and bloom never sees it. It is cleared with every frame: call it each frame of a transition, and one that forgets to stop cannot leave the screen black. In a script it isrender.veil, which the lens fades in with.
Depth of field
setDepthOfField(distance, range, scale) focuses the lens: distance to the subject in metres,
range the depth that stays sharp, and scale how much of the depthOfField ceiling to use, so 0
turns it off for a moment for free; the lens's render.focus is the same call, with the focus
switch as its scale. Racking focus is yours, for the same reason exposure is: the game knows what
the camera is looking at. A ceiling of 0.02 is a strong defocus, two per cent of the
frame's height. It costs eight taps on the pixels out of focus and one comparison elsewhere.
Motion blur
setCameraMotionBlur(scale, maxShare), or render.motionBlur in a script, scales the
cameraMotionBlur ceiling for this frame; maxShare is the longest smear, as a share of the frame,
0.03 unless given. The blur comes from the camera's movement between frames, so it smears a whip
pan or a fast flight and leaves a still frame untouched. Ramp it with speed, as the example does
from the camera's turn rate: blur that is always on stops reading as speed within seconds and
becomes a filter. It costs eight taps on moving pixels.
Under DriftTR each drawn object is blurred by its own motion: a draw that names where it was
last frame (a Mover, as the reconstruction asks for anyway) smears along its own path, so a kick
or a thrown body blurs while a still stage behind it stays sharp. Without a reconstruction, and on
WebGL2, the camera's motion alone blurs the frame, and the renderer says so once when a draw names
its previous placement.
setSpeedRush(strength), render.speedBlur in a script, is a second speed cue, applied to the finished image, for the moments a
game wants to say "fast". Both are held until changed.
Call renderer.cameraCut() on the frame a shot changes, or the first frame of the new shot is blurred
along the jump from the old one.