 DriftEngine
Rendering
Picking
What is under the pointer, from meshes registered for it, with the hit's point and distance, moving pickables, and a set of your own.
npm install @driftengine/core
Picking answers one question: what is under this pixel. The renderer tests a ray through the pixel against meshes registered for picking and returns the nearest hit. Everything around that question, hover, press, drag, the difference between a click and a drag, belongs to the game, which already has that logic for its controls. Hover over the example and click a shape.
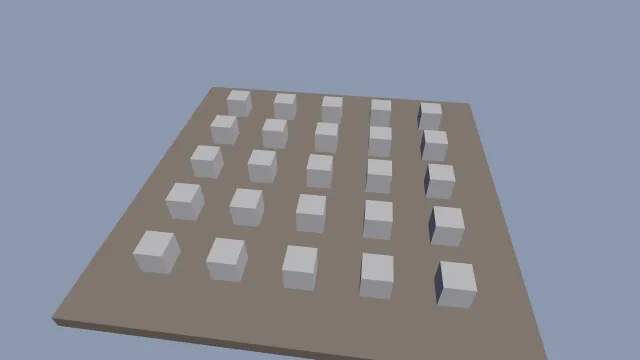
Starts examples/picking in this page, on WebGPU where your browser has it.
Registering
/** Each shape is drawn and registered for picking, with the same geometry and the same matrix. */
const shapeData = new MeshBuilder()
  .addBox([0, 0.4, 0], [0.4, 0.4, 0.4], [0.75, 0.75, 0.78])
  .build();
const shape = renderer.createMesh(shapeData);
const nodes: SceneNode[] = [];
const handles: number[] = [];
const lifted: boolean[] = [];
for (let row = 0; row < 5; row += 1)
  for (let column = 0; column < 5; column += 1) {
    const node = new SceneNode();
    node.setPosition((column - 2) * 2, 0, (row - 2) * 2);
    node.updateWorld();
    nodes.push(node);
    handles.push(renderer.registerPickable(shapeData, node.worldMatrix));
    lifted.push(false);
}registerPickable(meshData, model) adds a mesh's positions and indices at a model matrix and returns
a handle. Register the same geometry you draw, with the same matrix, so what is picked is what is
seen. Picking runs on the CPU against your data and never reads the GPU, so it answers the same on
both backends and costs nothing on frames that do not ask.
Each mesh's box in the world is computed when its matrix is set, so a ray rejects nearly everything with a box test and only the survivors pay for their triangles.
Asking
/** Where the pointer is, in the canvas's CSS box, and whether a click is waiting. */
let pointerX = -1;
let pointerY = -1;
let clicked = false;
canvas.addEventListener('pointermove', (event) => {
  const box = canvas.getBoundingClientRect();
  pointerX = event.clientX - box.left;
  pointerY = event.clientY - box.top;
});
canvas.addEventListener('pointerleave', () => {
  pointerX = -1;
});
canvas.addEventListener('click', () => {
  clicked = true;
});Pointer positions are CSS pixels inside the canvas: event.clientX minus the canvas's left edge,
with no device pixel ratio to think about.
/* What is under the pointer: the nearest registered mesh along its ray, or nothing. */
const hit = pointerX < 0 ? null : renderer.pickAt(camera, pointerX, pointerY);
const hovered = hit === null ? -1 : handles.indexOf(hit.handle);
if (clicked && hovered >= 0) {
  lifted[hovered] = !lifted[hovered];
  const node = nodes[hovered];
  node.setPosition(node.position[0], lifted[hovered] ? 1 : 0, node.position[2]);
  node.updateWorld();
  /* A pickable that moves is told where it went. */
  renderer.updatePickable(handles[hovered], node.worldMatrix);
}
clicked = false;pickAt(camera, x, y) returns the nearest hit or null. A hit says which handle it was, the
distance along the ray, and the point in the world where the ray met it. The point is reused
between queries, so copy it to keep it. A pick allocates nothing, so calling it on every pointer
move is fine.
A pickable that moves is told where it went with updatePickable(handle, model), or it is
picked where it used to be. unregisterPickable(handle) removes one.
Rays of your own
camera.rayThrough(origin, direction, x, y, width, height) writes the ray through a pixel into two
arrays, for a game that wants to test it against something else: a ground plane, a physics world.
For gameplay, such as what a gun hits or what a character can see, cast against the physics world's
colliders instead; see the Simulation section.
A second set
The renderer's own set holds what the world draws. A PickableSet is the same machinery on its own,
for things the world never draws as meshes, such as an editor's gizmo handles, or for a set that
must be tested separately: add(source, model), update, remove, clear, and
pick(origin, direction) with a ray from rayThrough.