 DriftEngine
Rendering
Post-processing
The scene target screen effects need, brightness kept above white, bloom, ambient occlusion, and multisampled and temporal antialiasing.
npm install @driftengine/core
Screen-space effects work on the finished picture, so the scene has to be drawn somewhere they can read it. This chapter covers the effects that make a frame look finished: bloom, ambient occlusion and antialiasing. The tone curve, exposure, colour grading and the camera's own effects, motion blur and depth of field, are in Colour and motion.
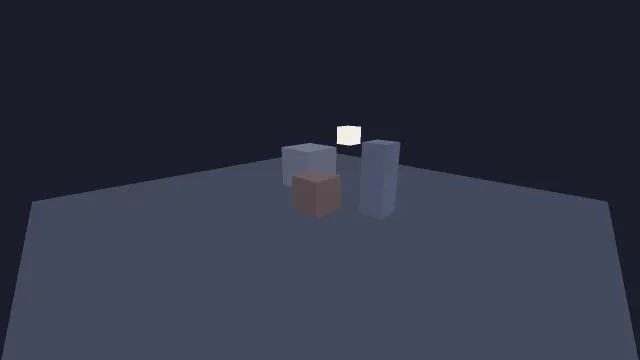
Starts examples/postprocess in this page, on WebGPU where your browser has it.
The scene target
screenEffects, on by default, draws the scene into an off-screen target and composites it to the
canvas at the end of the frame. Every effect in this chapter needs it. Off, there is no post stage
at all: the scene draws straight to the canvas, nothing extra is allocated, and that is the honest
low-end setting, since the target costs one write and one read of every pixel whatever runs on it.
Brightness above white
hdrScene keeps the scene's real brightness to the end of the frame, in half floats, and applies
the tone curve once there. Without it, each surface is clipped to the range 0 to 1 as it is shaded,
and a lamp at five times white and a sheet of white paper arrive at the end as the same colour. It
also grades the sky, particles, films and water consistently with the world. It changes the
picture slightly even where nothing is brighter than white, so it is off by default. It needs
screenEffects, and a device that cannot render to float targets keeps the eight-bit target.
Bloom
/**
 * Ambient occlusion decides what the renderer allocates, so its switch builds a new renderer.
 * Bloom's ceiling is set once with the range it needs, and its switch moves the dial.
 */
const quality = (ao: string) => ({
  ambientOcclusion: ao === 'on' ? 1 : 0,
  ambientOcclusionRadius: 0.6,
  hdrScene: true,
  bloom: 0.9,
  bloomThreshold: 1.2,
  outputTransform: 'aces' as const,
  directionalShadows: true,
});bloom, 0 to 1, is how far a bright pixel spreads past its own edges: what a lamp, a star or a
neon strip needs to read as overwhelming. bloomThreshold is how bright a pixel must be to bloom,
in scene units: 1 means "brighter than white", where only sources of light sit. The threshold is
subtracted, not cut, so there is no edge where a gradient crosses it.
Bloom and hdrScene are a pair. Without the range, nothing in the scene is above 1 when bloom
looks at it, a threshold of 1 finds nothing, and the renderer says so when it is built. The bloom is
added in linear scene units and the tone curve then rolls off the sum.
/** Emissive, so it is brighter than 1 in scene units and is the only thing bloom can find. */
const lampMesh = new MeshBuilder();
lampMesh.addBox([0, 0, 0], [0.35, 0.35, 0.35], [1, 0.82, 0.55], 1.6);
const lamp = renderer.createMesh(lampMesh.build());The lamp is emissive, and emissive light is switched by the environment's nightFactor. At 0 the
lamp emits nothing and bloom finds nothing above the threshold, which is easy to mistake for bloom
not working; the example's dusk environment sets it to 1.
setBloom(scale, threshold) moves both per frame. A threshold compared before exposure means a
different on-screen brightness at every exposure, so a scene whose exposure moves through a day
passes the threshold it wants on screen divided by the exposure.
How bloom answers
/**
 * A colour comes in over two units past the threshold rather than having the threshold taken off
 * it, and each of the six levels, finest first, is weighted by a stage's own tint. Both thresholds
 * are compared before exposure, so a frame exposed by `exposure` divides them by it.
 */
export function stageBloom(renderer: RendererApi, exposure: number): void {
  renderer.setBloom(1, 0.1 / exposure, {
    ramp: 2 / exposure,
    tints: [
      0.35, 0.35, 0.35, 0.14, 0.14, 0.14, 0.12, 0.12, 0.12, 0.07, 0.07, 0.07, 0.07, 0.07, 0.07,
      0.06, 0.06, 0.06,
    ],
  });
}The third argument of setBloom is a BloomResponse, for a scene authored against a different
bloom. ramp, in scene units, brings a colour in gradually from the threshold, none of it at the
threshold and all of it that far past, where the default subtracts the threshold; a very low
threshold with the subtraction keeps almost every light at full strength and washes the frame.
tints weights each of the BLOOM_LEVELS levels, finest first, three numbers a level; white is
the identity, and a tint may pass one to carry a strength. Neither costs a pass, and a frame that
names no response blooms as it did.
Ambient occlusion
ambientOcclusion, 0 to 1, darkens where surfaces meet: a box on a floor, a wheel in its arch, the
inside of a panel gap. It is most of what makes a model sit in a room instead of floating over it.
It compares depth with its neighbours inside the pass that already holds depth, so it costs no extra
target and no second draw of the scene. 1 is the top of the range and useful mostly to see where it
lands while tuning.
ambientOcclusionRadius is how far it looks, in metres, so a two-centimetre gap darkens the same
from across the room as from close up. Match it to the gaps that matter: half a metre, the default,
for a room or a vehicle, more for a landscape.
setAmbientOcclusionFade(distance, radius) fades it out with distance: whole up to distance metres
from the eye and gone radius metres past it. Far off, the depth buffer's steps are metres apart and
the estimate shades them in rings across a sky dome or a mountain range; past the fade those pixels
are left open and skip the work. It is held until changed and does nothing where ambientOcclusion
is 0. A negative distance, the default, fades nothing.
Occlusion is measured from the depth the opaque world leaves, and glass, smoke, water, text and lines write none, so it darkens only the part of a pixel they let through: smoke in front of a corner stays the colour of the smoke, and a pane at 0.85 opacity takes 0.15 of the darkening behind it. Light added on top, such as sparks or a glow, is darkened with the surface it lands on. A pass of your own says which of these its blending is; see Custom passes.
Antialiasing
With screenEffects on, the canvas's own antialiasing is turned off, because only one full-screen
triangle reaches the canvas and it has no edges. Something has to replace it.
/** The sample count decides how the scene target is allocated, so changing it builds a new renderer. */
const quality = (samples: string) => ({ sceneSamples: Number(samples), directionalShadows: true });
const scene = await openScene(quality(flag('samples', '1')), build);

controls([
  {
    key: 'samples',
    label: 'sceneSamples',
    value: flag('samples', '1'),
    options: [
      { text: '1 (off)', value: '1' },
      { text: '4', value: '4' },
    ],
    change: (value) => scene.rebuild(quality(value)),
  },
]);sceneSamplesmultisamples the scene target: 1 is off, 4 is usual. It works on geometry edges and leaves texture detail alone, and costs memory bandwidth in proportion to the samples.temporalAaantialiases across frames: the projection moves a fraction of a pixel each frame and the result blends into where the last frame was. It costs one texture and one pass, against multisampling's multiplied fill rate. It is exact for a still world under a moving camera; a moving object under a still camera is rejected from the history, not corrected.
Both are off by default. The example's posts lean a few degrees off vertical, which is where missing antialiasing shows most.
Call renderer.cameraCut() before the first frame of a new shot. Everything temporal reads the
previous frame through the previous view, and a cut looks to the renderer exactly like a very fast
camera: without the call, the first frame after a respawn or a seek blends in a picture of somewhere
else.
Transparency in any order
orderIndependent replaces sorted blending of translucent draws with weighted blending, whose sum
does not depend on order: two panes that intersect stop fighting. It costs two targets and a second
draw of the translucent geometry. See Translucent and additive meshes.
What it costs
Every option here is a quality option, fixed when the renderer is built, because each one decides
what is allocated or which shader is compiled. Changing one means a new renderer: the example's
ambient occlusion switch builds one in place, and the lamp carries on circling. Bloom shows the other
way to switch: its ceiling is set once with the range it needs, and setBloom moves the dial in the
running frame. The exposure, grade and camera dials are in Colour and motion.