 DriftEngine
Rendering
Splines, ribbons and lines
Curves sampled by arc length, banked surfaces swept along them with gaps and colliders, the exact ground on a route, and world-space strokes with real width.
npm install @driftengine/core
Three tools for anything that follows a path: a Spline says where the path goes, buildRibbon
sweeps a surface along it, and RibbonSurface answers where the ground is on it. Separately, a line
batch draws strokes with a real width in metres, for trajectories, trails and debug rays.
A spline
/** Control points carry a bank, in radians, and a width, in metres, as well as a position. */
const points: SplinePoint[] = [
  { x: 0, y: 0, z: 0, bankRad: 0, widthM: 8 },
  { x: 40, y: 4, z: -30, bankRad: 0.35, widthM: 7 },
  { x: 90, y: 2, z: -20, bankRad: -0.2, widthM: 7 },
  { x: 130, y: 10, z: 30, bankRad: 0, widthM: 9 },
];
const route = new Spline(points);
console.info(`${route.lengthM.toFixed(1)} m long`);Spline is a Catmull-Rom curve sampled by arc length, so samples are evenly spaced in metres
whatever the curve does. Sampling by parameter bunches them in tight corners and stretches them on
straights, which would give a swept surface huge triangles on the fast sections and a width that
pulses through every bend.
Each control point carries a bank, the roll about the direction of travel, and a width. Both follow
the points through a smooth curve, so there is no crease at a control point. sampleAt(distanceM, out) gives the position at a distance along the route with its frame: the tangent, the surface
normal after banking, and the right-hand direction. The frame is carried along from the previous
sample, never rebuilt from world up, so it cannot flip when the route climbs vertically.
A ribbon
/** A slab swept along the route, with one gap a player has to jump. */
export function buildRoute(renderer: RendererApi) {
  const holes = [{ fromM: 70, toM: 78 }];
  const { mesh, colliders } = buildRibbon(route, {
    color: [0.36, 0.38, 0.44],
    stepM: 1,
    thicknessM: 0.6,
    holes,
  });
  const surface = new RibbonSurface(route, { holes });
  return { mesh: renderer.createMesh(mesh), colliders, surface };
}buildRibbon sweeps a closed slab along the spline and returns mesh data and colliders built from
the same corners, so what you see is what you hit. Holes are stretches where the surface isn't
there; geometry and colliders both respect them, because a gap that is drawn but still solid looks
like a jump and plays like a floor.
The options build more than a road: edgeBandM and edgeSide build only a strip along one edge,
lateralFromM and lateralToM a band between two offsets, liftM raises it, so a kerb or a painted
line is another ribbon over the same spline. shade varies the colour per cross-section, and
fromM and toM build one stretch.
The ground on a route
const hit = createSurfaceHit();

/** Where the ground is in a column, and where along the route that is. */
export function groundUnder(
  surface: RibbonSurface,
  x: number,
  z: number,
  y: number,
): number | null {
  if (!surface.sample(x, z, hit, y)) return null; // over a gap, or off the route
  // hit.distanceM is how far along, hit.lateralM how far off the centre line, hit.normal* the face.
  return hit.y;
}RibbonSurface answers the question a character controller and a vehicle actually ask: in this
column, where is the surface, and which way does it face? It answers with the exact banked surface,
not the colliders' boxes, whose flat tops sit at the height of the highest corner. It also says how
far along the route the point is, how far off the centre line, and how much width is left before
the edge, which is most of what a racing game's rules need.
A query costs a grid lookup and a fixed number of Newton steps. The count is fixed so that it is the same on every machine, which determinism needs.
RibbonSurface is one kind of GroundSurface. BoxSurface is another, for flat pads;
heightSurface wraps a function of your own, or several stacked, so a road can pass under a road;
colliderSurface turns a set of colliders into ground; and CompositeSurface asks several and
keeps the best answer. The character controller and the vehicle both take one as their ground.
Lines with real width
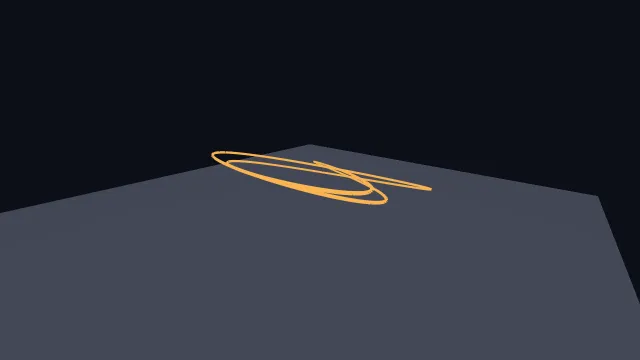
Starts examples/lines in this page, on WebGPU where your browser has it.
WebGL2 draws one-pixel lines on almost every driver, and WebGPU draws no wide lines at all, so the engine expands each segment into a quad that faces the camera.
/** One stroke of 220 segments, allocated once. `capacity` is segments, not points. */
const POINTS = 221;
const segments = createLineSegments(POINTS - 1);
const batch = stage.renderer.createLines(POINTS - 1, 'example-trail');
const path = new Float32Array(POINTS * 3);A segment buffer and a line batch are allocated once, at a fixed capacity. capacity counts
segments, one fewer than the points that make them.
segments.count = setPolyline(segments, path, POINTS);

stage.renderer.beginFrame([0.05, 0.06, 0.09]);
stage.renderer.bindMeshPass(stage.camera, DAYLIGHT);
stage.renderer.drawMesh(ground, still.worldMatrix);
stage.renderer.drawLines(
  batch,
  segments,
  still.worldMatrix,
  stage.camera,
  DAYLIGHT,
  [1, 0.72, 0.32],
  width,
  1,
  softness,
  /* The floor: at least two millimetres of half-width per metre away, about a pixel. */
  0.002,
);setPolyline rewrites the buffer in place from a flat list of points and returns how many segments
are live. drawLines takes the batch, the segments, a model matrix, the camera, the environment,
then a colour, a width in metres, an opacity, an edge softness, and a minimum width per metre of
distance, which stops a far stroke from thinning below a pixel and flickering. A last additive
argument makes a stroke add light instead of covering what is behind it.
Lines are blended and fogged like anything else in the world. For a stroke that is light itself, an arc or a beam, see Particles and effects, which draws bolts.